
Steam Deck - Content Creation on a Budget: Recording in Gaming Mode (Part 2 of 7)
In the last part, we covered how to record and master your gameplay in Desktop Mode. Now let’s explore an alternative way to record your gameplay, unique to Steam Deck. Thanks to the magic of the modding community, recording in Gaming Mode from the comfort of your sofa (or couch, or anywhere for that matter) is now possible!
This starter guide is a big one, but I’ll walk you through this and the reward will be worth it. As I say, I’ve been doing it this way on YouTube for a while now! You will not only record, but also dip your toes into editing. As usual, the important steps and tips are highlighted in bold like this if you want to save time.
Let’s delve in!
What You’ll Need
You’ll need the following hardware for the editing part of this guide:
A gaming headset with 3.5mm jack (I used a Razer Kraken X Lite. The Steam Deck has a built in mic but it isn’t the best tool for this job)
Steam Deck Docking Station or USB-C hub (including HDMI port, at least 2 USB ports, and USB-C charging passthrough with at least 45w charging power)
Mouse & keyboard
A monitor (or TV)
Let’s Get Everything Ready!
I’m going to kick this off with a quick disclaimer: Decky Loader is a third party modification that allows the installation of third-party plugins. Therefore, this is to be used at your own risk. I’ve used this for multiple video uploads and have good reason to favour it, however this remains your choice. If you feel uncomfortable with this, follow my previous post instead to record in Desktop Mode.
If you’re good to go, let’s install this now. Head into desktop mode by first pressing the power button (or pressing the [ Steam ] button, then selecting the ‘Power’ option).

Now select ‘Switch to Desktop’.

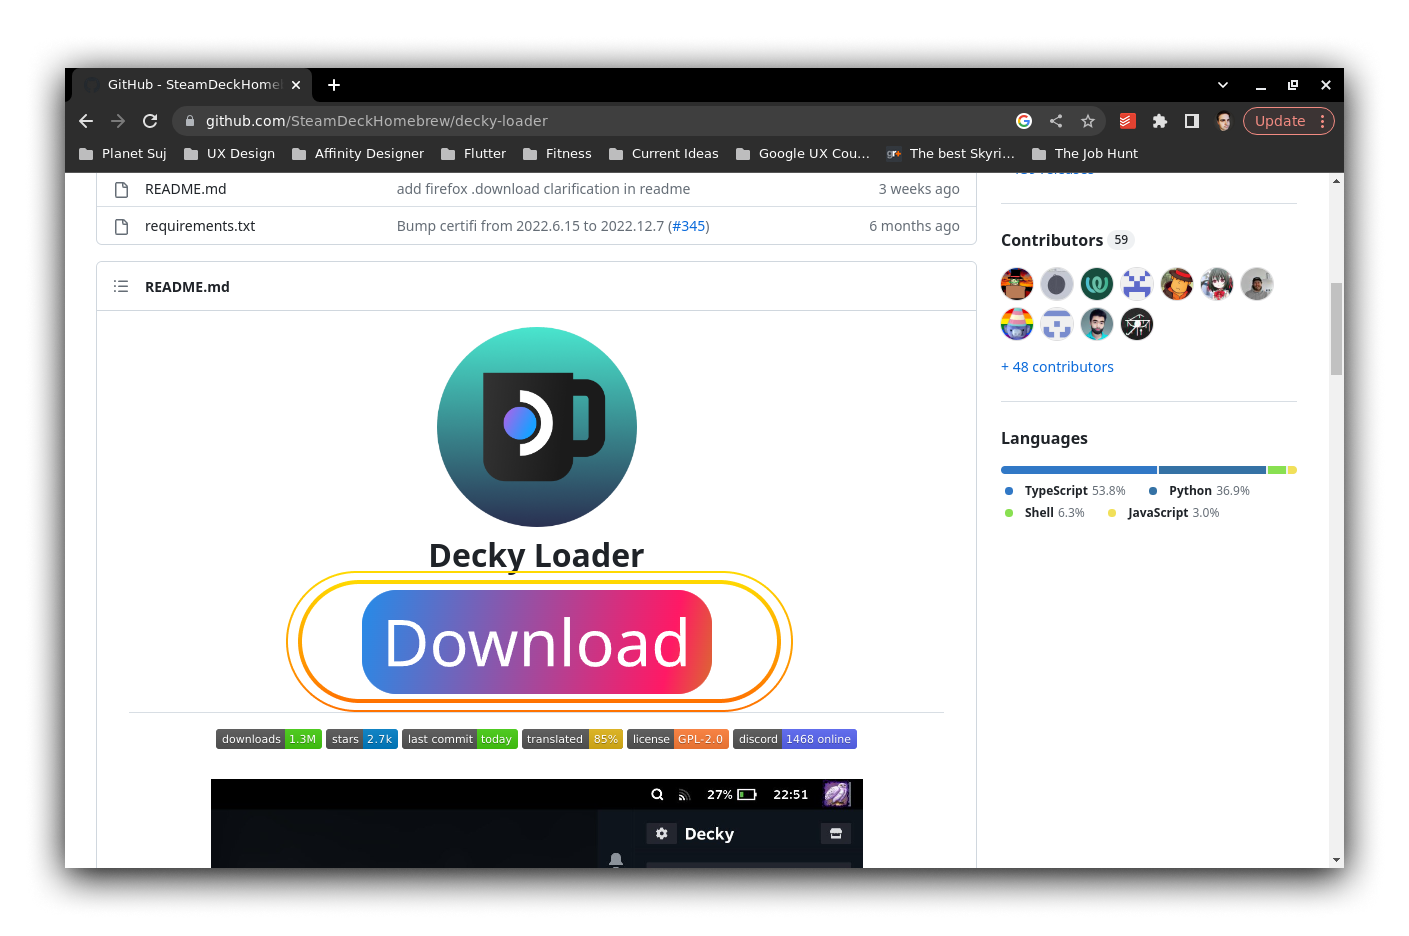
Once in Desktop Mode, download the Decky Loader installer from here using the download button on the page.
Follow the instructions in the ‘Installation’ section below that button to install Decky Loader. You will see a Matrix-like Konsole terminal window pop up during the process. Keep following the instructions until this is finished.
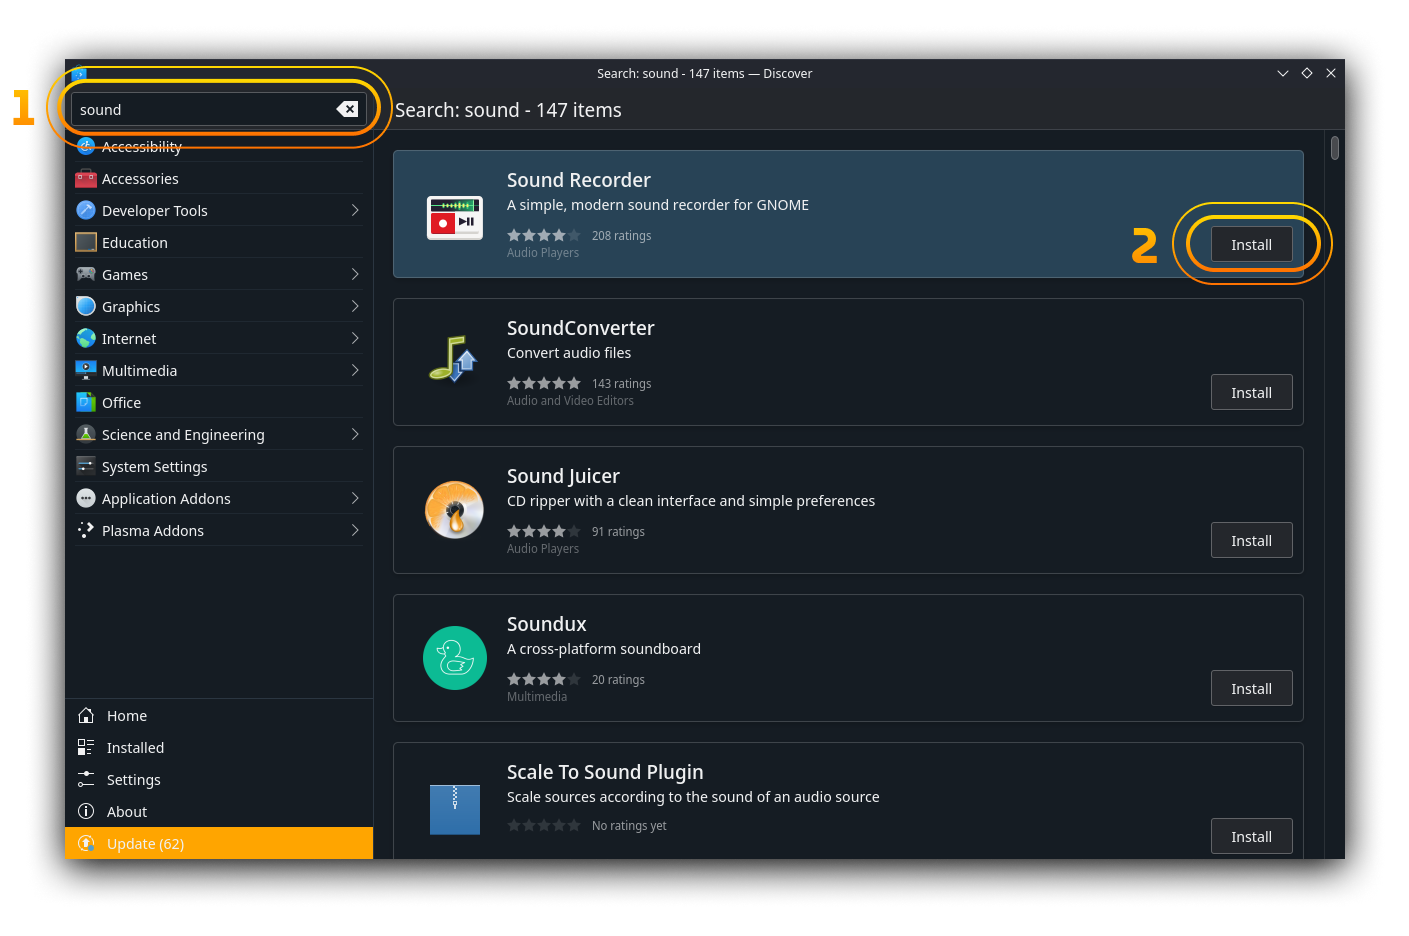
Now open the Discover app then search for and install Sound Recorder, Audacity and Kdenlive (& Discord if other players’ mic audio is required). I’ll tell you more about these later.
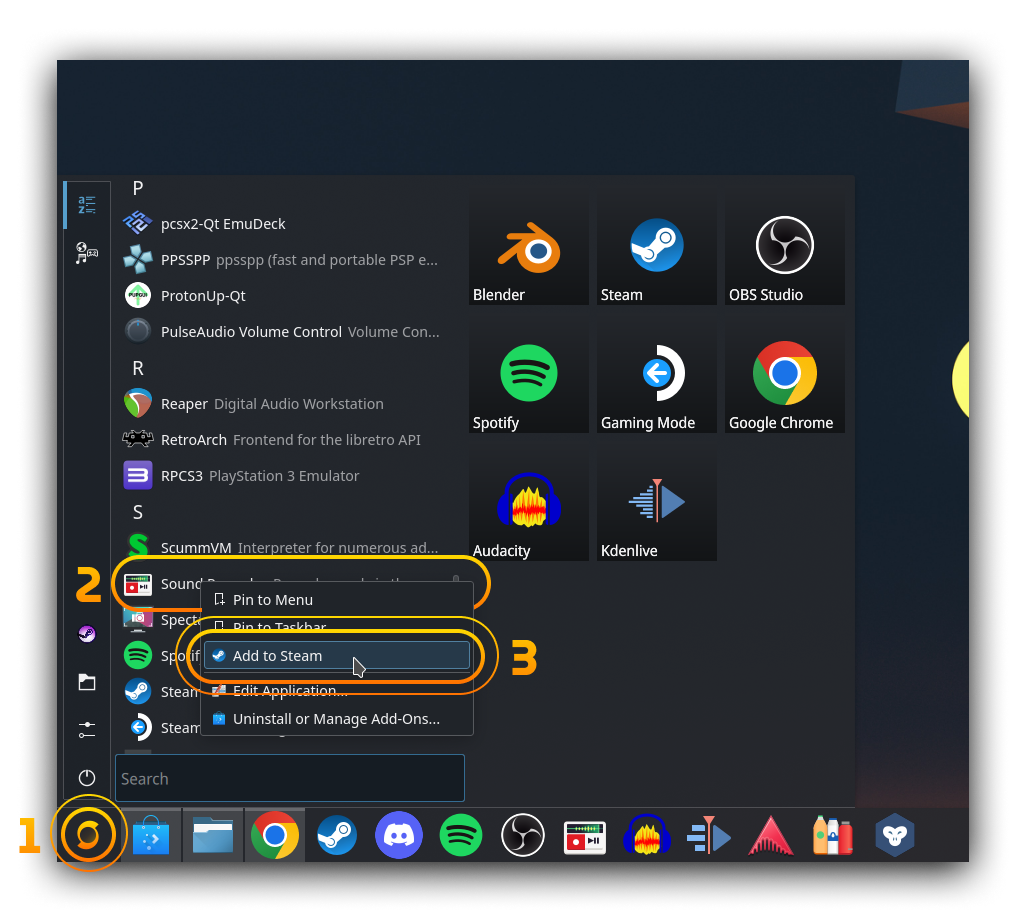
Now add Sound Recorder (& Discord if required) to Steam by opening the ‘Launcher’ menu (your button icon will look different to mine). Now right-click your app and select ‘Add to Steam’ for each. This makes them usable in Gaming Mode.
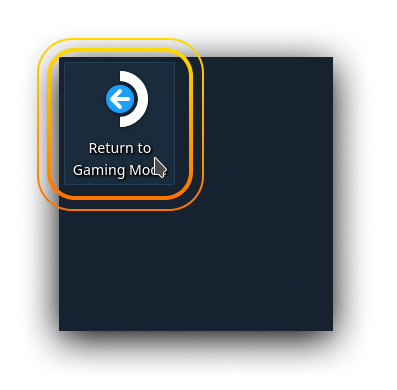
Optional: you can also change the artwork for each app in Steam if they look unsightly, learn more in my previous post here. Once ready, return to Gaming Mode using the desktop shortcut.
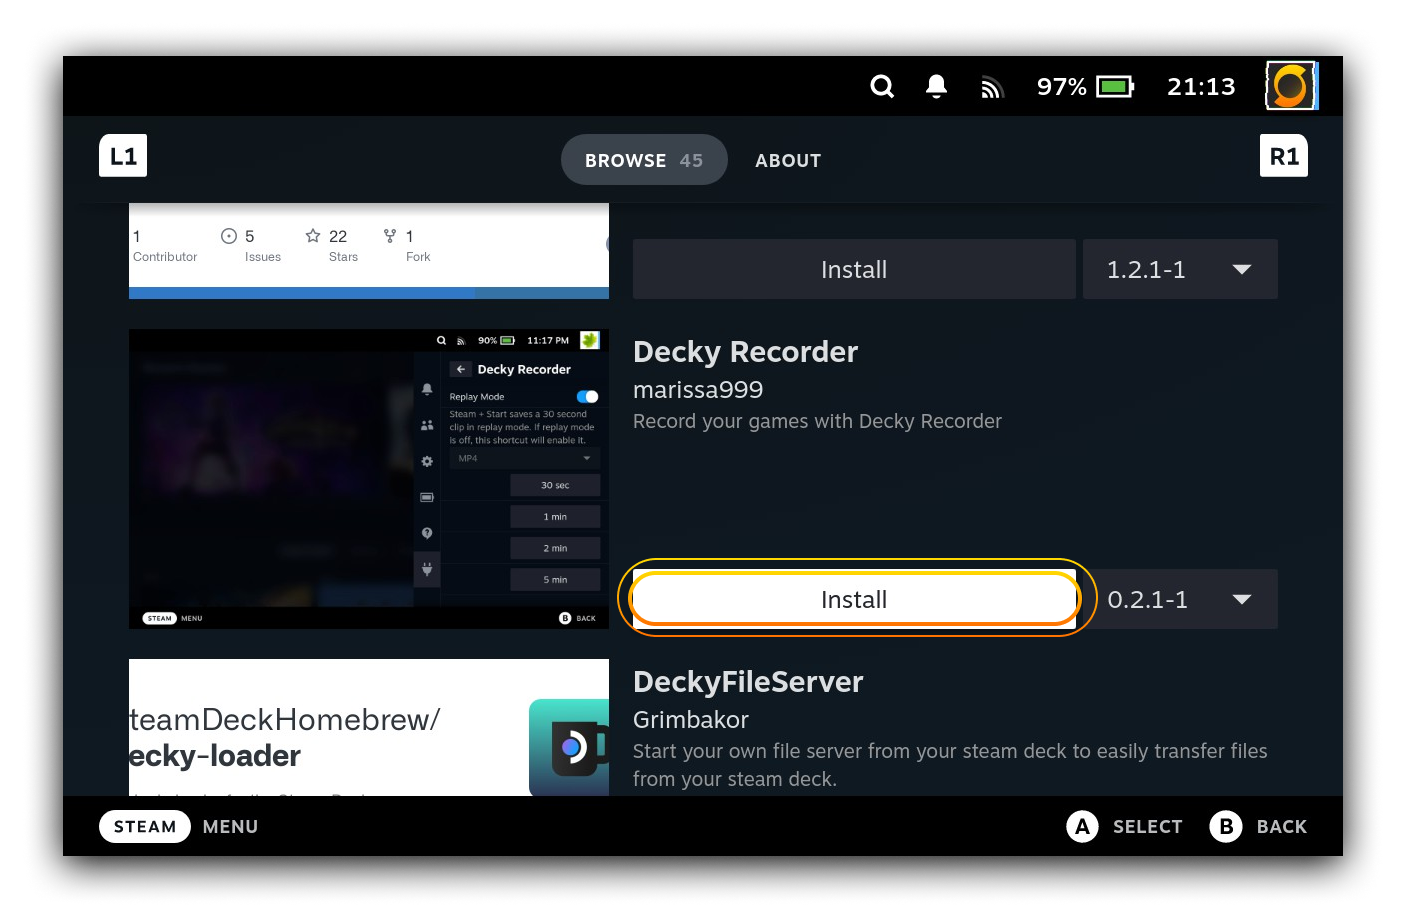
Press the [ … ] button and you should see a new ‘Decky’ option. Press it, then head to the ‘Marketplace’.

Now find and install Decky Recorder.
We’re ready to go, let’s move on!
Let’s Get Set Up & Recording!
Let’s set the stage! Firstly we need everything open and running. You can open multiple apps by opening the first app, then hitting the [ Steam ] button and selecting ‘Library’ to open another. Open Sound Recorder and the game you want to play (& Discord if other players’ mic audio is required).

You can also switch between apps by pressing [ Steam ], selecting one of the open apps, then selecting ‘Resume game’.

This is how you multitask in Gaming Mode. If you are using Discord and have more than one other player on mics, you may want to adjust their volume levels so that they are matched better. You can do this by right-clicking any user in an active voice chat, and adjusting ‘User Volume’.

I’d also advise heading to your game settings and lowering audio to about half or less of the other players’ mic volume.
When the levels are right, it’s time to get recording. Switch back to Sound Recorder and tap the ‘Record’ button. You can try this multiple times to check your volume level before pressing for the final time.

Now switch back to your game and press the [ … ] button. From here select the ‘Decky’ icon, then ‘Decky Recorder’.

We’re now about to record! A few tips here before you start:
If you clap near the mic as you hit the ‘Start Recording’ button in Decky Recorder, this will help to sync audio to video footage later (like the clapper device directors use while calling ‘action!’)
If you have a headset, keep the mic about 1-2 inches from your mouth and off to the side slightly. This minimises distortion from breathing.
Leave a gap of 5-10 seconds before speaking if you will be introducing the video to viewers. This will help with things such as fade in effects when editing later.
Wait around 5-10 seconds at the end before you cease recording, again for editing purposes.
Hit ‘Start Recording’ to begin.

If Decky Recorder is misbehaving, troubleshoot the following:
If Decky Recorder doesn’t show anything in its area: go to any other quick setting icon after pressing the [ … ] button, then go back to ‘Decky’ > ‘Decky Recorder’.
If Decky Recorder still isn’t working as expected, try the following:
If the button doesn’t say ‘Stop Recording’, try tapping this again.
If this still doesn’t work, restart Steam by pressing the [ Steam ] button then ‘Power’ > ‘Restart Steam’. If this doesn’t work try ‘Restart’ instead.
Still no luck? Check for the latest updates by heading to ‘Decky’ > ‘Settings’ > ‘Plugins’. If the dropdown next to ‘Decky Recorder’ says ‘Reinstall’, then it’s on the latest version.
If nothing else works, try reinstalling Decky Recorder by clicking that option.
If all is well, enjoy your session! Return to this point when you’re done.
Once you’ve finished, press the ‘Stop Recording’ button in Decky Recorder.

Now switch back to Sound Recorder and tap the ‘Stop’ button.

Lastly tap the name field, name the sound clip (use [ Steam ] + [ R1 ] to bring up the on-screen keyboard) and confirm.

OK, we’re now ready to combine everything. Close all apps & switch back to Desktop Mode when ready.
Let’s Put it All Together!
This part takes a little while, but stick with it!
From this point onwards, make sure that all of your hardware is set up so that your USB-C dock is plugged in & charging your Steam Deck, and your mouse, keyboard & monitor are also connected.
When you’re ready, let’s get into it! Create a new folder in a memorable place to store video and audio in (the name of the game can work here). You don’t have to put this in ‘Video’ If you don’t want to, just remember where it is. Within this folder, add two new folders with the following names: ‘Raw’ & ‘Final’.

Decky Recorder will save footage to ‘/home/deck/Videos’ by default. Find your video footage and rename it (right-click > ‘Rename…’).
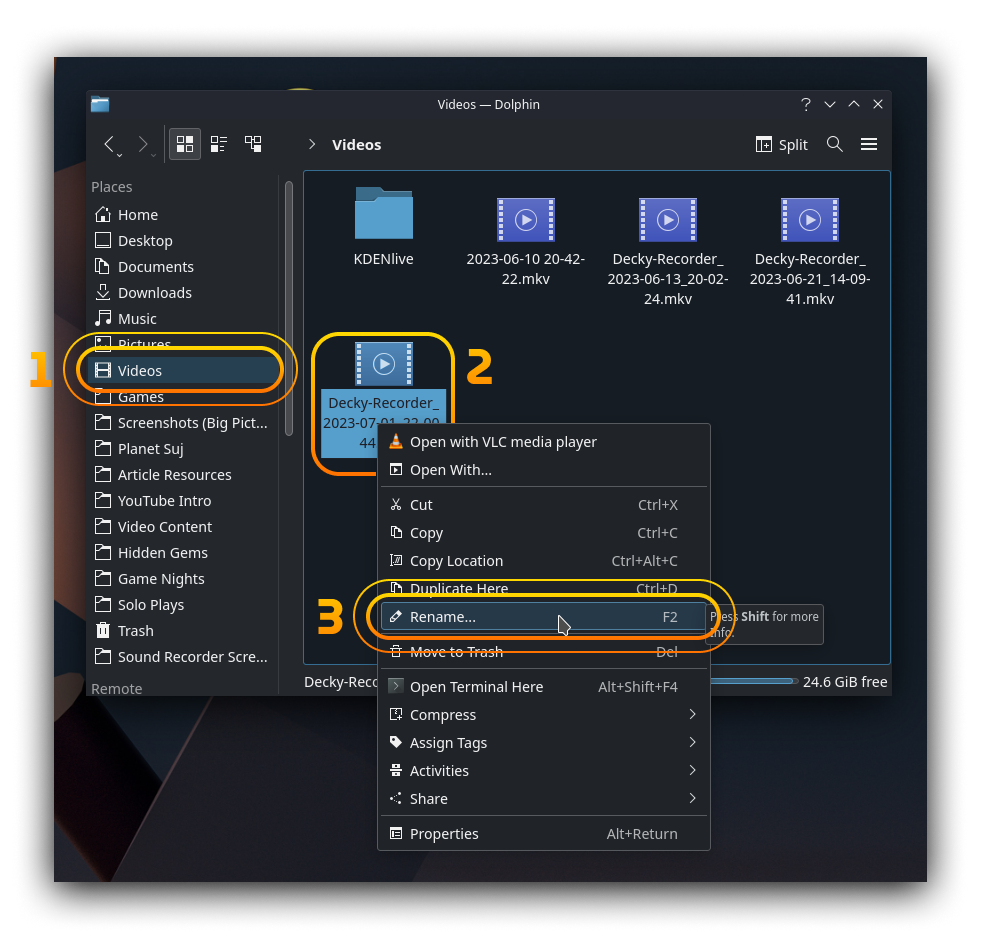
Now move it to your newly created ‘Raw’ folder (if you’re wondering how I split the window, hit the little ‘Split’ button in the top right!)

Now let’s retrieve your mic audio. Open Sound Recorder, find your audio clip and hit the ‘Export’ button (if you can’t see it, click the audio clip to make the buttons visible)

Select your ‘Raw’ folder once again as the destination, then name and save.

This will export your audio in FLAC format, which is usually fine but there is one caveat: Kdenlive doesn’t play nice with FLAC. This means we need to convert the audio into a different format.
Enter Audacity, the ever-dependable Microsoft Paint of music (though there is far more depth than first appears!). Open Audacity, then drag your FLAC file into the empty grey area.

Now export it into a WAV file by heading to ‘File’ > ‘Export’ > ‘Export as WAV’.

Although a compressed format such as MP3 is much smaller, you want as much quality as possible when using raw footage. Remember, YouTube compresses your audio as well!
Now select your ‘Raw’ folder as the destination, name & save, then hit ‘OK’ on the next window. You don’t need to name it differently from the original FLAC name as it’s a different format.

You may close Audacity now. No need to save, its job here is done (for this post at least!).
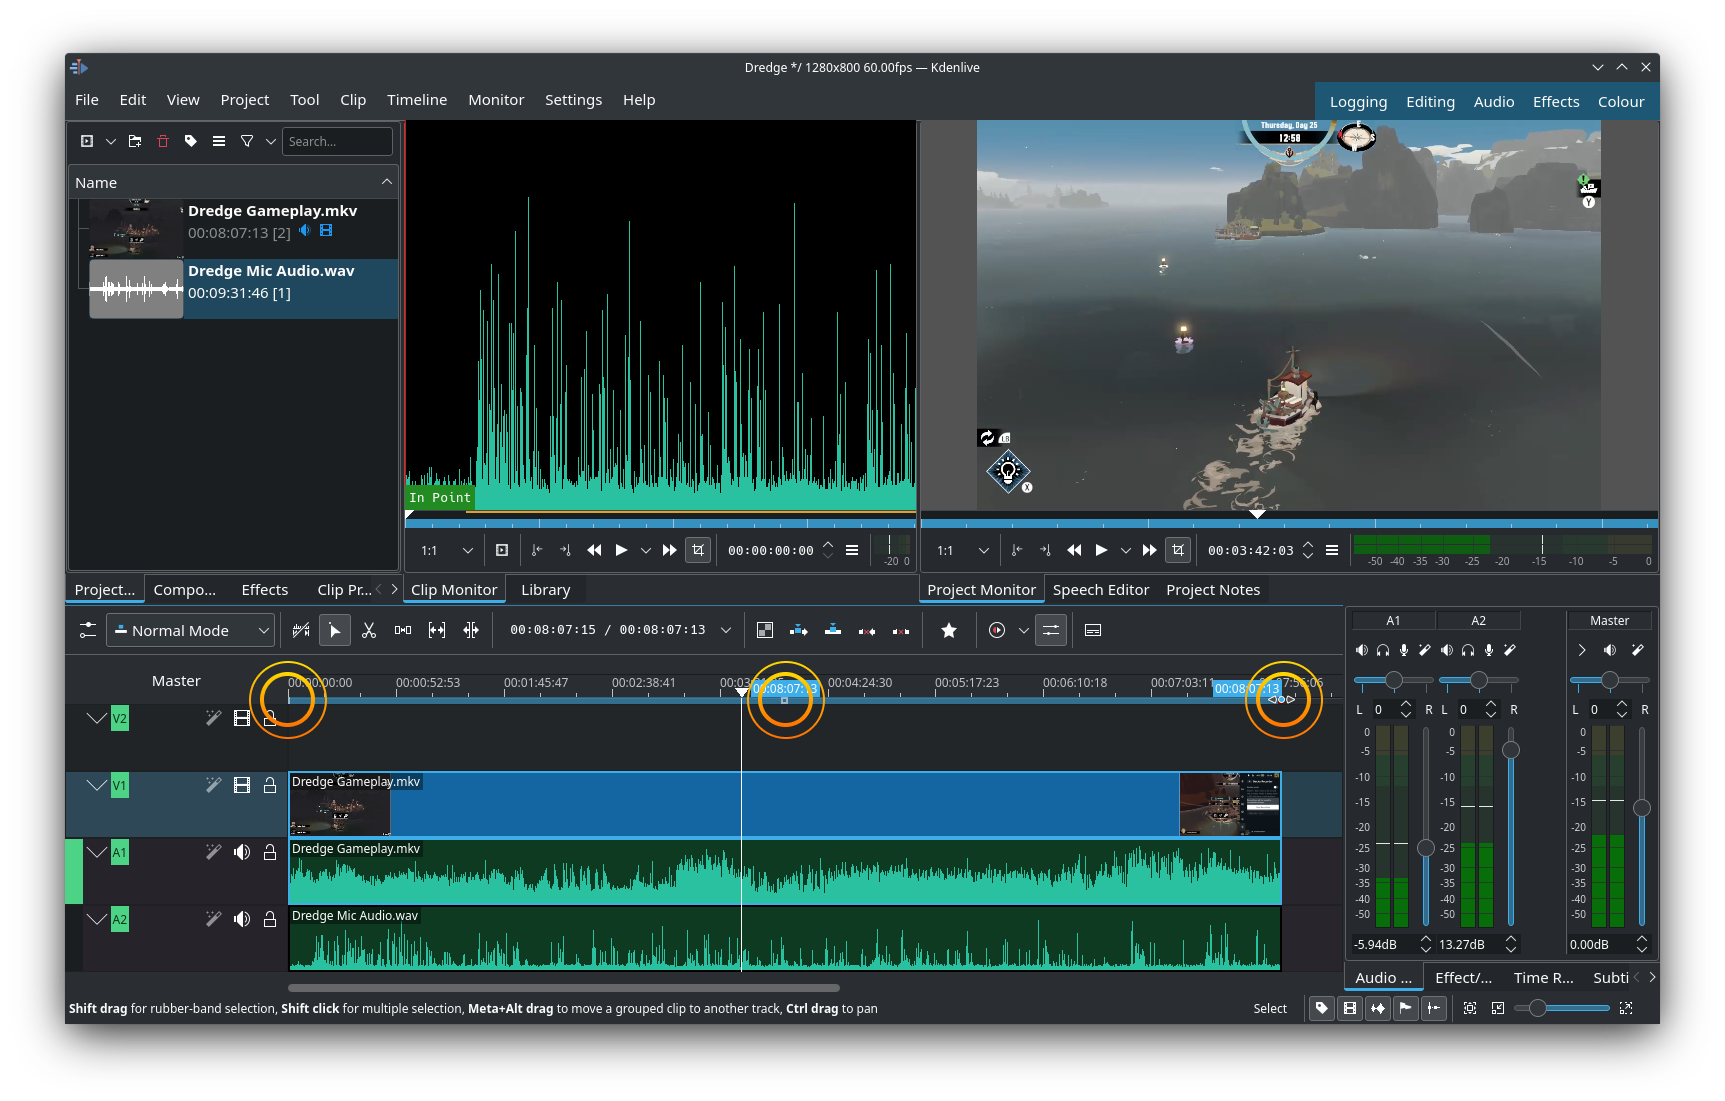
Your assets are now ready. It’s time to introduce our video editing suite: Kdenlive. Open it up and get to the point where you reach this screen.
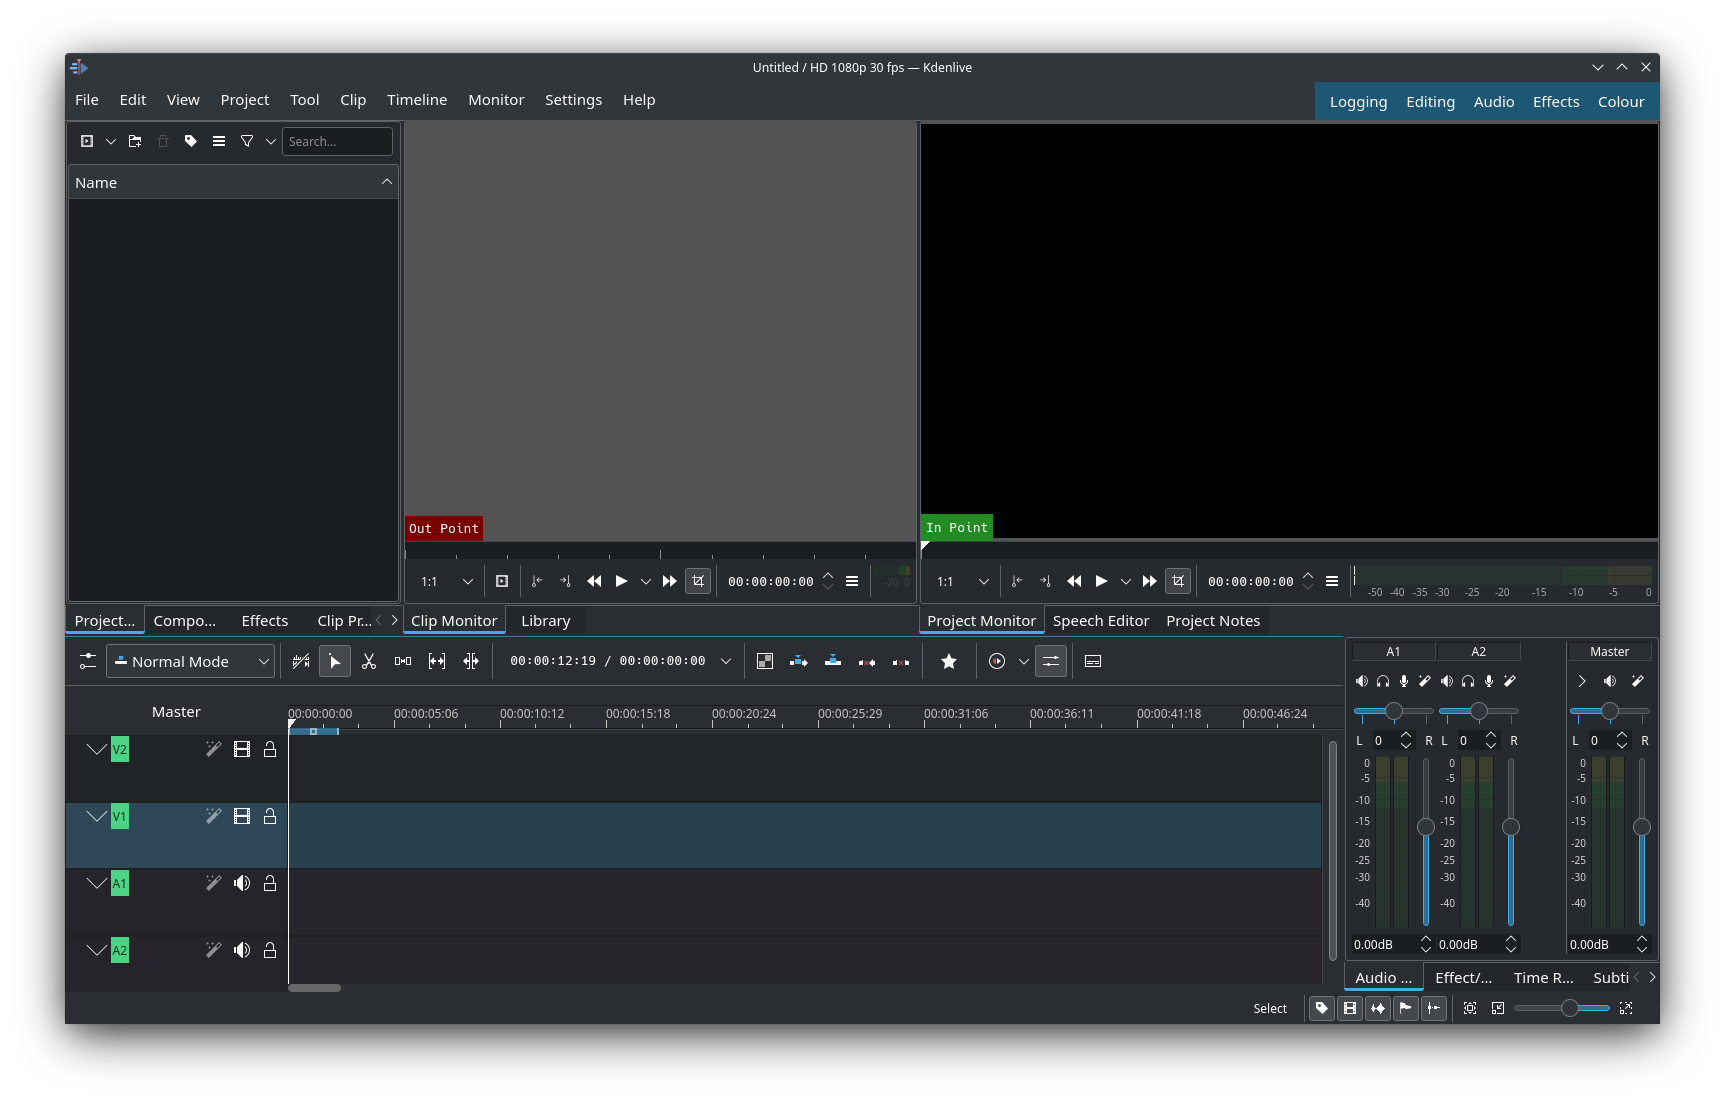
Just like OBS Studio in the last post this may look daunting, but Don’t Panic! I will show you the important areas and walk you through it!
The first place is the ‘Project Bin’ area in the top left. If you don’t see this initially, click the ‘Project Bin’ tab to put it in focus.

This area stores all of your assets for use in your project. Add your video footage to your project by dragging this to the ‘Project Bin’ area.

If your video footage is the first asset, you will be asked if you want to change video settings to ‘1280x800 60.00fps’ or similar on import. Of course, say yes to this.

If the option wasn’t offered, try deleting the asset and importing again. If fps shows as ‘59.94fps’ or something similar instead of ‘60.00fps’ (like above), head to ‘Project’ > ‘Project Settings’.

Now change the preset to ‘1280x800 @ 60.00fps’ within the ‘Presets’ area.

Next, add your mic audio in the same way as your video footage to the ‘Project Bin’ area.

You should now have all of your assets in the ‘Project Bin’ area.
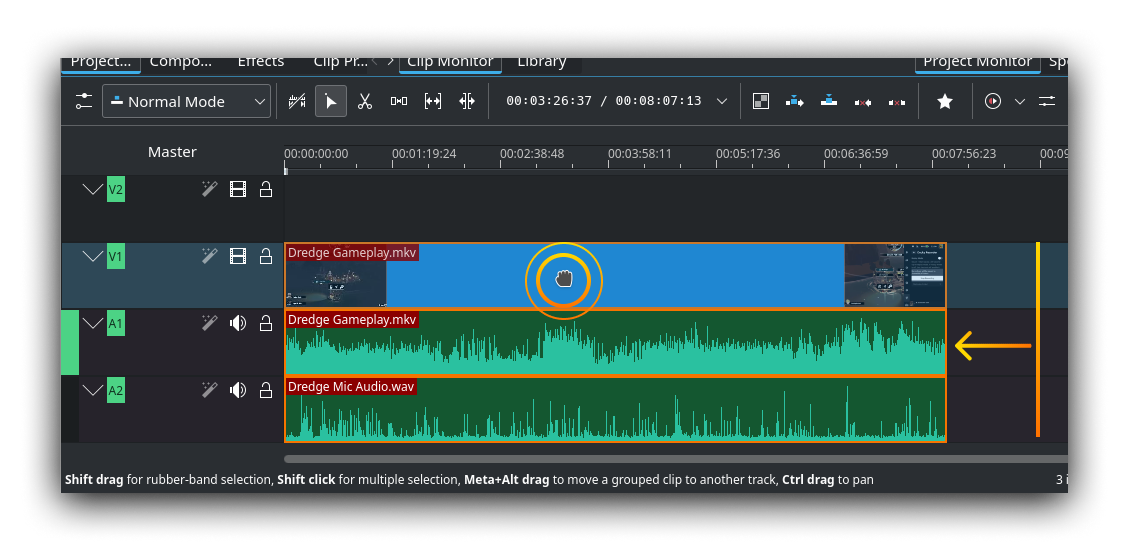
Let’s turn our attention to the ‘Timeline’ area. Here, you have labels on the left marked as audio tracks (e.g. ‘A1’) and video tracks (e.g ‘V2)’. Let’s drag our video footage from the ‘Project Bin’ next to video track ‘V1’.

It should snap to the beginning of the timeline. You’ll also notice that the audio part of the footage matches to the corresponding audio track label (e.g. ‘A1’ matches with ‘V1’).
Next, drag your mic audio next to audio track ‘A2’.

To monitor as you make changes, you can start and stop the playhead (the moving line with triangle on top) by either pressing [ Space ] or the play button in the ‘Project Monitor’ area.

If you want to play from a certain point, click with the mouse where the time markers are at the top of the timeline. You can also drag with your mouse to seek; the video and audio play when you do which is a very helpful thing.

Let’s trim the audio slightly. Drag the left part of the audio clip until it matches the ‘clap’ sound you created during recording. If you didn’t do this earlier, try to align your mic audio with the video footage by dragging the audio clip left and right. Moving your video footage to the right temporarily can help with this. You can also scroll with your mouse wheel to zoom in and out for extra accuracy

Once done with this, drag each end of your audio clip to match your video footage to make things easier.

Now drag both clips to the beginning of the timeline.
Nice, we have everything synced! Let’s proceed to balance audio levels a bit. On the bottom right, click the tab marked ‘Audio Mixer’ to bring up the audiometers.

Now keep playing back the footage and checking audio levels. Adjust these up and down using the faders in the ‘Audio Mixer’ area, so that the audio level reaches the lower part of the yellow area on the audiometers at its loudest. If you can’t hear yourself over the game, make the game footage a bit quieter. Take your time with this part.

Good job, we’re nearly there!
Let’s Render it Out!
OK let’s render out the final video, this is what we’ve been building up to! First we want to set the range we want rendered. Set the selection region by dragging and scaling the blue bar in the top part of the timeline to match the start and end of the video. If you can’t see this, drag it out from ‘0’ on the timeline initially.
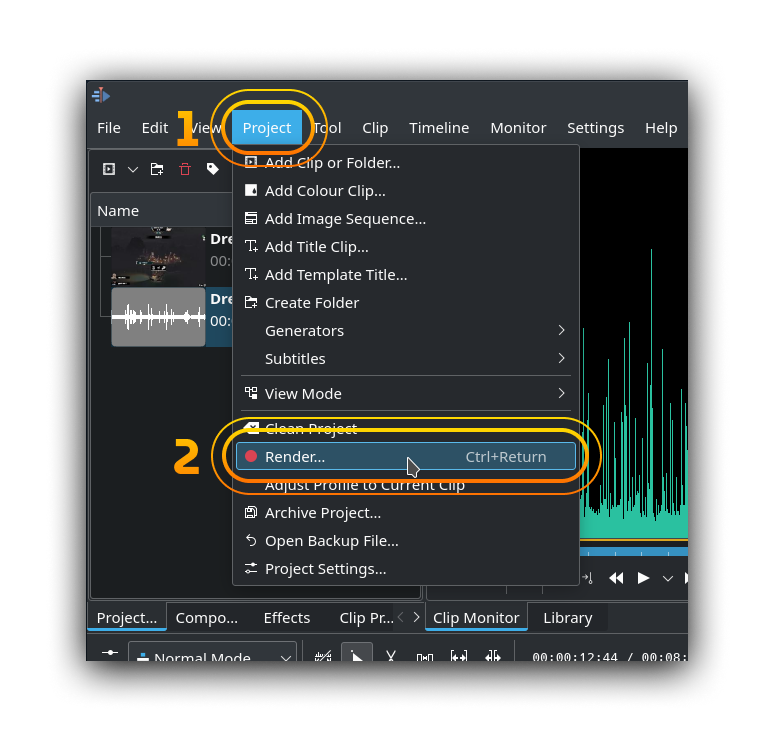
Next, head to ‘Project’ > ‘Render’ to open the rendering options menu.
Set the format of the video in the ‘Presets’ area (‘MP4’ or ‘Matroska’ under ‘Generic’ are good picks).

Next, click the button next to the ‘Output File’ text input.

Now set your ‘Final’ folder created earlier as the destination, name your final video and hit ‘Save’.

Next select ‘Selected Zone’ as the rendering option, then hit ‘Render to File’.

Now the final video is rendering. This may take a little while but when this is complete you’ll hear a noise and see a tick next to your render job. After this you can double-click the job to open your final video location and check out the result!

Finally, don’t forget to save your Kdenlive project. And that’s it, you now have a watchable video of your gameplay session!
Where We're At
Congrats, you’ve successfully created a video of your gameplay in the most comfortable way possible, and set your foundation in video editing! I’m making a note here: your mic audio might not sound great at the moment (I know mine was pretty noisy!). In the next part we are going to address this. I will help you to process your mic audio to make it as clear as possible and hopefully teach you some more useful tricks along the way.
Until then, I thank you for following this guide and hope to see you next time. Bye for now!